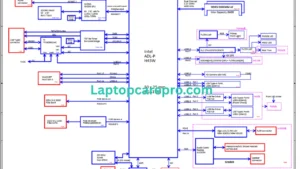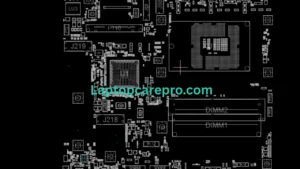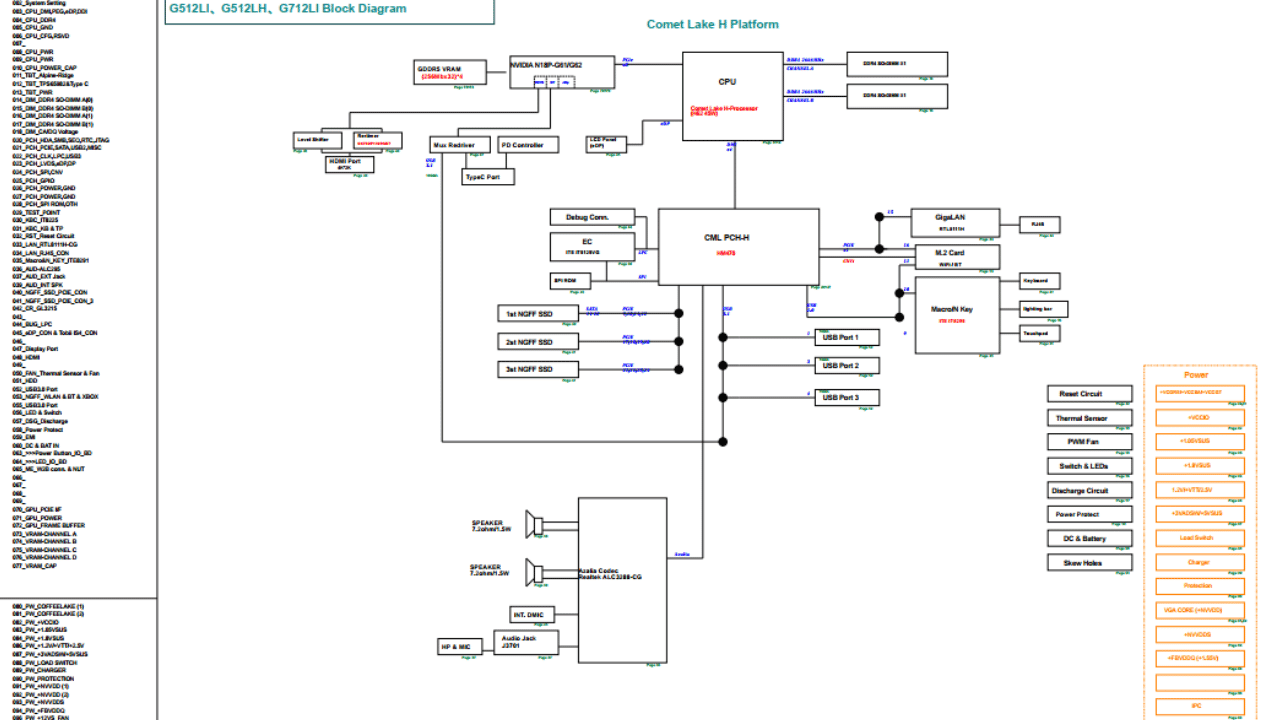
ASUS ROG G512LI REV2.0 Schematic Boardview
In the world of laptop repair and modification, having access to a device’s schematic boardview is akin to holding a treasure map. It reveals the intricate wiring and component connections of the motherboard, serving as a crucial resource for diagnostics, repairs, and upgrades. This is particularly true for high-performance laptops like the ASUS ROG G512LI REV2.0, a device celebrated for its gaming prowess and advanced technology. This article aims to guide general users through understanding and utilizing the schematic boardview of the ASUS ROG G512LI REV2.0 to troubleshoot and fix various issues.
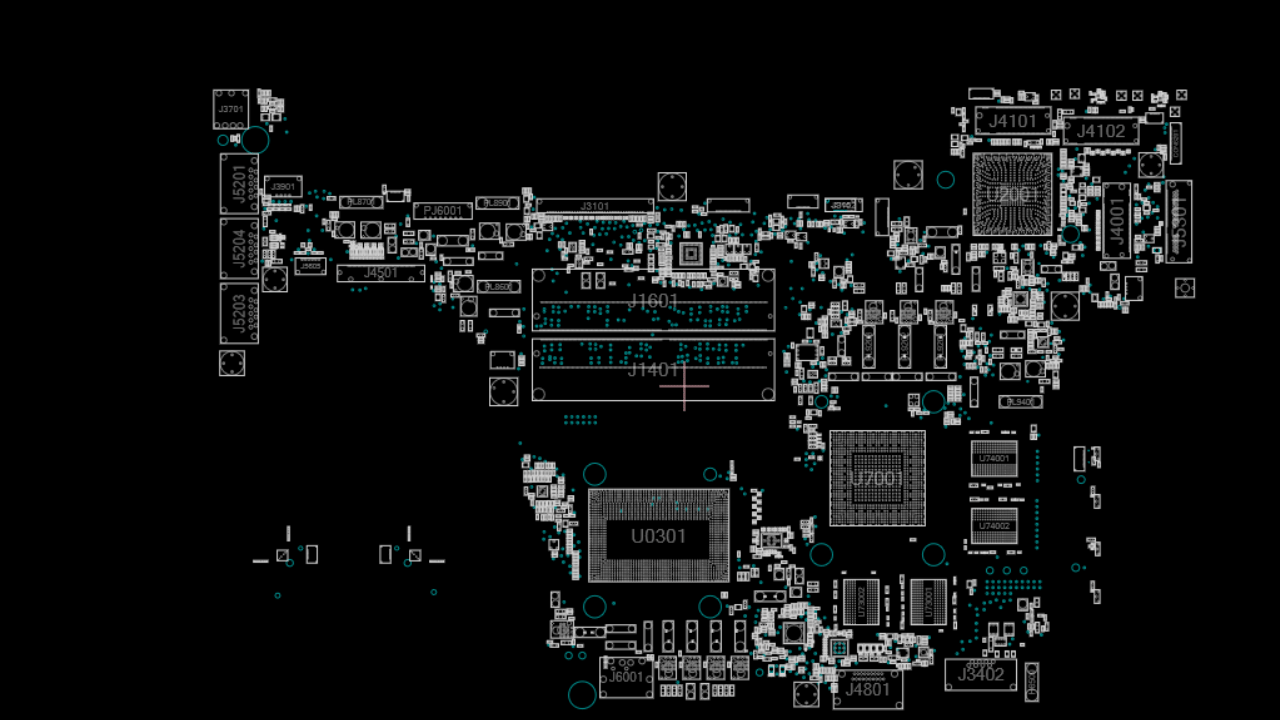
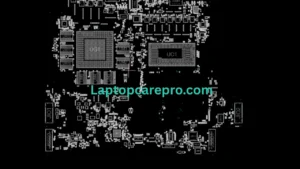
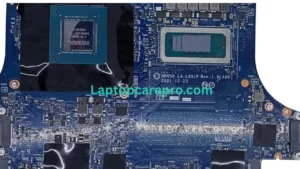
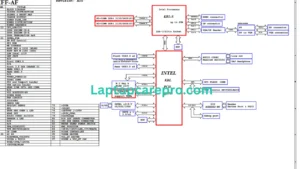
A schematic boardview is a detailed diagram that shows the electrical connections and layout of a motherboard. It includes information about each component, their locations, and how they’re interconnected. This tool is invaluable for anyone looking to repair or upgrade their laptop, as it helps identify parts and understand the device’s electrical architecture.
For devices as complex and finely tuned as the ASUS ROG G512LI REV2.0, a schematic boardview is essential for diagnosing issues that go beyond simple software fixes or hardware replacements. It allows users and technicians to pinpoint problems at the circuit level, facilitating repairs that can significantly extend the life of the device and improve its performance.
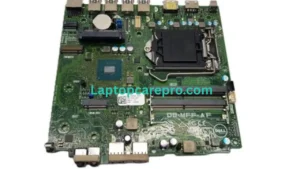
The ASUS ROG G512LI REV2.0 is part of the Republic of Gamers lineup, known for its cutting-edge performance and gaming-oriented features. With a powerful processor, dedicated graphics, and advanced cooling systems, it’s built to handle intensive tasks and gaming sessions. However, like any complex electronic device, it can encounter issues that require a deep dive into its hardware.